
How To Send an Invoice on Paypal in 8 Simple Steps (2024)
Invoicing is an essential process for just about every business. Whether you’re billing clients for your work or collecting payment for sales to other businesses, it’s important that your invoicing system is quick, easy, and gets you paid on time.
PayPal is one of the top invoicing and online payment tools for small businesses. In this guide, we’ll explain why PayPal makes invoicing so simple, break down the benefits of using PayPal for your business and your clients, and provide a step-by-step tutorial for sending invoices with PayPal.
Key Takeaways
- PayPal is a fast, easy, and cost-effective way to create and send invoices to your customers.
- PayPal offers customizable invoices, recurring invoices, integrated payments, and other useful features.
- PayPal and other online invoicing tools help you stay on top of accounts receivable, ensuring you get paid faster for your products or services.
Table of Contents
- How To Create and Send an Invoice on PayPal
- Importance of PayPal Invoicing
- Alternative Invoicing Option
- How To Send an Invoice on FreshBooks
- Effortless Invoicing Simplified
How To Create and Send an Invoice on PayPal
PayPal is a great tool to speed up your invoicing process and, ultimately, get yourself paid sooner. So how does it work? What is a PayPal invoice? How do you create and send a PayPal invoice? Here’s what you need to know:

1. Login to PayPal
First, you’ll need to create a PayPal business account if you don’t already have one. This is a quick and easy process—you can even turn an existing personal account into a business account.
To convert your account, head to your profile setting pages, and click “convert to a business account.” The site will guide you through the rest of the process. You’ll need to enter information about your business and verify your email and phone number. Then just log into the account as usual.
2. Create an Invoice
Next, it’s time to create your first invoice. You’ll find the option for PayPal invoicing under “Tools” at the top of the page. Click “Invoicing,” and then “Create invoice” to get started.
Choose Your Template
PayPal offers a handful of invoice templates, giving you some customization over the look of the final document. Choose your favorite (or stick with the default) and head to the next step.
Choose Your Currency
PayPal defaults to using USD as its currency, but you have the option to change it before filling out your invoice.
Add Your Business Information
Next, add the necessary information about your business. This includes:
- Your name
- Your business name
- Tax ID number
- Email address
- Phone number (optional)
- Logo (optional)
- Website (optional)
3. Enter Customer Information
You’ll need to provide some information about the invoice recipient. PayPal only requires you to enter the customer’s email, but it’s good practice to include other optional information, including:
- First and last name
- Business name
- Address
- Customer contact information
- Delivery address (if applicable)
- Billing address (if different from delivery address)
- Any additional notes about the invoice
PayPal gives you the option to save this information, which is a useful feature if you think you’ll be working with the client again in the future.
4. Enter Product/Service Information
The next step is to enter the details of the products or services rendered. The exact way you show this will depend on the nature of your business. It’s recommended to add a brief description of the products/services and include an itemized cost breakdown if necessary.
PayPal will have you enter the following product/service information:
- Item(s)
- Quantity of each item
- Price of each item
- Taxes (if applicable)*
- Item description
*To add taxes to your PayPal invoice, hit the “Add Tax” button in the drop-down box. Enter the name and rate of the tax you’re charging. It will auto-calculate for that row, but you’ll need to repeat it for any other taxable items on the invoice.
This section has a few other optional fields, which you can fill out to help avoid miscommunications or disputes:
- A message to your customer (e.g., ‘Thank you for your business!’)
- Terms and conditions
- Uploads or attachments (e.g., quote, contract, work agreement, etc.)
- Note to self (a memo for your records, not visible to the client)
5. Add dates and invoice number
The system will automatically generate a number for your PayPal invoice—you can change it if necessary for your internal records. You’ll then need to add the relevant dates to the invoice:
- Invoice Date: The date on which the invoice is created. On your PayPal invoice, this is set to the current date by default, but you can change it to a date in the past or future (future-dated invoices will be scheduled and sent on that day).
- Date of Services/Products Rendered: The date you provided goods or services to the customer.
- Payment Due Date: PayPal sets this to ‘Upon Receipt’ (immediately) by default. But you can set the due date 10, 15, 30, 45, 60, or 90 days in the future if you prefer. PayPal lets you set up automatic payment reminders for accounts receivable—your customers will receive periodic emails reminding them of the invoice until it is paid. Find this feature under “Manage Invoices” in your Dashboard.
6. Add Info About Shipping and Discounts
If applicable, add any details on shipping methods and rates. Also, be sure to add any discounts you might have provided the customer. PayPal will recalculate the total based on anything you enter here.
7. Double-Check
Don’t forget to take a moment to review your invoice. Check all the fields and information to ensure there aren’t any incorrect numbers, typos, or anything else that could cause confusion.
8. Send
With everything correctly entered, you’re ready to send your invoice! Hit the blue “Send” button at the top of the screen to deliver your invoice to your client’s inbox.
Importance of PayPal Invoicing
Why use PayPal to create your invoice? There are countless reasons that PayPal has become an indispensable invoicing tool for small businesses. Here are a few things that make it so important:
All-in-One Solution
You can create, edit, and send a professional-looking PayPal invoice without any other tools. PayPal lets you easily add your logo, shipping charges, terms and conditions, and all other information. This makes it a simple, cost-effective option for many businesses.
Integrated Payments
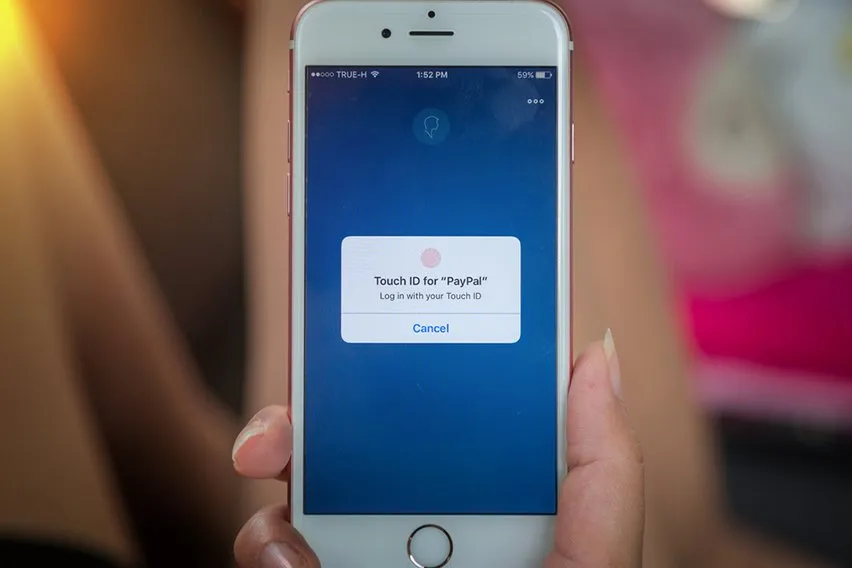
PayPal is widely used, which means using it for invoicing can greatly speed up payments. If your customers have a PayPal account, you can bill it directly with PayPal invoices. Of course, customers are still able to pay with a credit or debit card or by other means.
Templates
PayPal invoicing allows you to create multiple invoice templates for quick billing. It also lets you import data from previous invoices, which is great for efficient billing for repeat business.
Accounts Receivable Tracking
PayPal invoicing is useful for tracking unpaid invoices. It has an option to sort them by time outstanding and has a feature to send email reminders in a single click. You can also manually mark invoices as paid if your clients pay with cash or check.
Suitable for Subscriptions
PayPal invoicing makes it easy to charge a recurring monthly bill to clients who retain your services ongoingly. It’s quick to modify the date and other details as needed by altering your templates.
Free
Invoicing and receiving payments are included features with a PayPal account. All you pay is the standard PayPal business account transaction fee when you receive payment from the customer (unless they pay by another means).
Communications
You can CC multiple people on an invoice (such as your business partners or a customer’s financial advisor) and you can split the invoice between multiple parties if you offer a group service.
Convenient
PayPal invoices make it simple for your customers to pay however they want, including credit cards, bank payments, via their own PayPal account, or even with paper checks.
Recordkeeping
PayPal invoices automatically create transaction records for you and your customer which is helpful for tax deductions and accounting.
Alternative Invoicing Option
Not sold on PayPal’s invoicing service? Many people prefer a more traditional platform that’s purpose-built for invoicing. One great option is FreshBooks, an all-inclusive accounting software that comes built-in with a powerful online invoice tool.
How To Send an Invoice on FreshBooks
Sending an invoice with FreshBooks invoicing software is simple. Here’s how to create an invoice with FreshBooks in just 7 steps:
1. Sign In
First, sign into your FreshBooks account (or create one if you haven’t already). Then, head to your account dashboard.
2. Create a New Invoice
Click the “New Invoice” button to start your first FreshBooks invoice.
3. Customize Your Invoice
You’ll be guided through the process of adding all your preferred visual elements to your invoice. Add your logo first—it will automatically appear on all future invoices (unless you change or remove it). Then, browse through our library of invoice templates to find the one that best suits your needs.
4. Enter Invoice Details
With your invoice template looking how you want it, it’s time to enter all the necessary information. This includes:
- Billed To: Information about your client (choose an existing client or add a new one)
- Description: A breakdown of your products/services, along with the rate/cost, quantity, and total amount
- Discount (Optional): Enter any applicable discount percentages in this field
- Request a Deposit (Optional): You can request a flat rate or percentage amount as a deposit for larger jobs
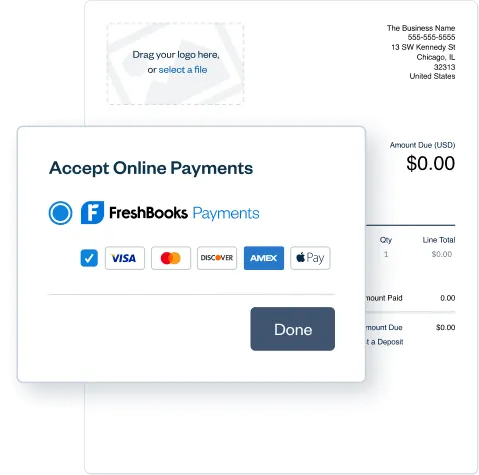
5. Accept Online Payments (Optional)
If you want to get paid faster, we recommend opting into our online payment platform. This allows your customers to pay directly through invoices using FreshBooks Payments. This will ensure each payment is automatically recorded in your account. It is a fast, easy, and secure way to handle transactions, with seamless integration for effortless financial management.
Customers can also pay with their credit or debit card via bank transfer, or PayPal.
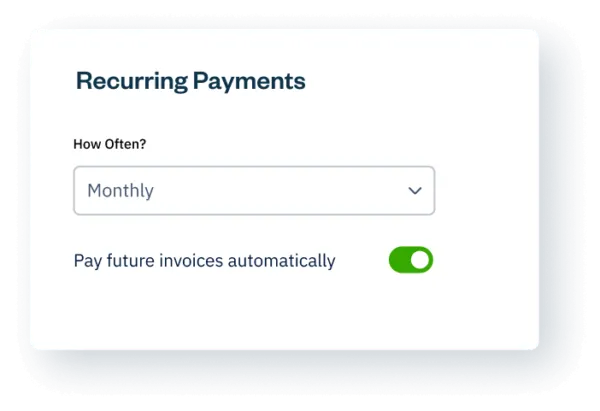
6. Make It Recurring (Optional)
If this is the first of many recurring invoices for this client, you can choose to repeat the invoice at a specified time in the future. FreshBooks Payments also lets you create billing profiles for each client.This feature allows you to save their preferred payment method (with their approval) and can include automated invoicing that’s scheduled to suit each client’s needs, making the entire billing and payment process automatic, streamlining operations, and ensuring timely payments.
7. Review and Send
Take a moment to add a personalized note at the bottom of your invoice, double-check it for any mistakes, and send it off! You can easily send it to your client via email or even print out the invoice if you prefer.

Effortless Invoicing Simplified
With tools like PayPal on your side, creating an invoice can be one of the easiest parts of running your business. Creating a good system for invoicing will help you spend less time on administrative tasks, improve your cash flow, and get you paid promptly for your work.
If you’re looking for an even simpler option with countless other features (ranging from in-depth reporting to full-on web accounting services), FreshBooks invoicing software is a great choice. With great functionality, countless invoice templates, automated payment reminders, and more, FreshBooks helps you manage invoices and get paid for your work faster. Try FreshBooks free today.

About the author
Michelle Payne has 15 years of experience as a Certified Public Accountant with a strong background in audit, tax, and consulting services. Michelle earned a Bachelor’s of Science and Accounting from Minnesota State University and has provided accounting support across a variety of industries, including retail, manufacturing, higher education, and professional services. She has more than five years of experience working with non-profit organizations in a finance capacity. Keep up with Michelle’s CPA career — and ultramarathoning endeavors — on LinkedIn.
RELATED ARTICLES
 Difference Between PayPal Personal vs Business Account
 What Is a Digital Wallet and How Does It Work?
 How Long Does a PayPal Refund Take?
 How to Cancel a PayPal Payment: Tips & Tricks
 How To Add Money To Paypal From Debit Card [2025]
 Semi-Monthly vs BI-Weekly Payroll: What’s the Difference?